Showing posts with label Easy. Show all posts

Thursday, September 12, 2013

Spaghetti Squash

Trying new things can be scary for me but I know it is good for me.  I am not always happy about change especially when there is nothing wrong to begin with.  But in life you must adapt.

I love pasta.  But sometimes you need a alternative to pasta.  Spaghetti squash is your answer!


Spaghetti Squash

Ingredients:
1 spaghetti squash
1 tablespoon garlic, chopped
1 onion, small diced
1/2lb ground turkey
 2 cups mushroom, sliced
1 tomato, chopped
1 jar marinara sauce
1 tablespoon garlic powder
1 tablespoon garlic salt
1 tablespoon fresh ground pepper
1 teaspoon oregano

Topping: shredded colby and cheddar cheese

Directions:
1. Cut spaghetti squash in half lengthwise and scrap out seeds.  Lightly spray insides of both halves with cooking spray. Broil for about 20 minutes
2.  Brown garlic and onions in large pan.
3.  Add ground turkey and cook until done.
4.  Add mushrooms and cook until soft
5.  Add tomato and cook for about 2 minutes
6.  Add marinara sauce, garlic powder, garlic salt, ground pepper, and oregano.  Cook for about 15 minutes.
7.  Shred spaghetti squash with a fork.  Add to sauce.
8.  Enjoy!

I am not a fan of sweet dishes that are not dessert.  So I was a little worried about this dish since I have never tasted spaghetti squash.  Turns out there really is not that much flavor in spaghetti squash.  Served with sauce spaghetti squash is a great substitute for noodles.  This dish is pretty versatile and you can pretty much add anything you like in a red pasta sauce.  I am curious how this would taste in a alfredo sauce. 

El Husbee devoured a bowl of this and was quite impressed that it was squash and not noodles.

I think next time I will add some red pepper flakes to give the dish a little kick.

Keep cooking friends!

XOXO

Wednesday, June 5, 2013

Paula Deen Chocolate Gooey Butter Cookies

A co-worker's son was selling cookie dough for a school fundraiser and I decided to indulge in some cookies.  Now I am normally a homemade from scratch kind of cookie dough girl but everyone once in a while I will buy cookie dough.  While going through the cookie dough catalog I noticed there was Paula Deen cookie dough and knew I had to try them.  

cookies right out of the oven
That Paula Deen really knows her stuff.  These cookies are amazing.  I don't understand how the powder sugar stays when the cookie dough is baking but the cookies come out so cute and they just melt in your mouth

cookies cooling
Paula Deen Chocolate Gooey Butter Cookies

Ingredients:
tub of Paula Deen Chocolate Gooey Butter Cookies
powder surgar

Directions:
1.  Preheat oven to 350 degrees
2.  Use cookie scoop and scoop out balls of batter.
3.  Roll balls into powder sugar
4.  Set cookie dough about 1 inch apart
5.  Bake for about 9 minutes
6.  Cool for about 5 minutes and enjoy

These cookies are amazing.  I wish I bought more tubs of this cookie dough.  I think I might need to google the recipe.  Hopefully Paula Deen shares her recipe for this cookie online.

Support the kids and buy cookies ... or cookie dough!

XOXO

Tuesday, June 4, 2013

Pineapple Angel Food Cake

Is anyone on Pinterest?  Pinterest has everything.  EVERYTHING!  My favorite catergory on Pinterest is the Food and Drink.  There are so many recipes on Pinterest that I want to try.

cake cooling
I decided to try making a pineapple and angel food cake recipe that I saw on Pinterest.  The cake only requires a box of angel food cake mix and a can of crushed pineapple.

This cake smells so good
Pineapple Angel Food Cake

Ingredients:
1 box of Angel Food Cake mix
1 can crushed pineapple 20oz

Directions:
1.  Preheat oven to 350 degrees
2.  Mix angel food cake mix and 1 can of crushed pineapple
3.  Pour mixture into a 9x13 pan and bake for about 30 minutes
4.  Cool before eating

This cake smells so good baking and your house afterwards will smell amazing.  This cake is so easy to make and taste amazing.  So much flavor and so fluffy.  But please be careful when baking.  I seemed to burned mine a little so I will make sure to watch more carefully the next time I make it.  A great way to eat this cake is with some vanilla bean ice cream.  Amaze-A-BALLS!  According to Pinterest you can also make this with fruit pie filling such as blueberry, lemon, and apple.  Considering trying this next time.

Keep baking!

XOXO

Sunday, June 2, 2013

Banana Bread

Sometimes when it comes to banana bread the simpler the better.  Don't get me wrong chocolate chips, nuts, and coconuts are yummy.  But sometimes a good ole simple banana bread really hits the spot.  

mini banana bread
Sometimes I like to not mash my bananas completely so there are nice chunks of banana in my bread.  It's not pretty to look at but it sure is yummy to eat.

that hole is filled with yummy banana

Banana Bread
yield 2 mini loaves

Ingredients:
1 3/4 cups all purpose flour
2 teaspoon baking powder
1/2 teaspoon baking soda
1/4 teaspoon salt
1/4 teaspoon nutmeg
1/2 cup vegetable oil
3/4 cup sugar
2 eggs
1 1/2 cups mashed rip bananas (about 3 medium bananas)

Directions:
1.  Preheat oven to 350 degrees
2.  Spray a mini loaf pan with cooking spray
3.  In a small bowl sift together flour, baking powder, baking soda, salt and nutmeg.  Set aside
4.  Beat together sugar and oil until combined.
5.  Add eggs and beat until well blended.
6.  Beat in flour mixture alternating with mashed bananas until incorporated.  DO NOT OVER MIX
7.  Pour batter into prepared loaf pan.  Bake for about 25-30 minutes or until a toothpick inserted into center comes out clean.
8.  Let cool for about 5 minutes in pan before removing to a wire rack to cool completely.
9.  Enjoy when cool!

I usually make all my quick breads in a mini loaf pan because they are cute and perfect for sharing.  The mini loaves allow me to try new recipes without expanding my waist line too much.  Plus everyone is always happy when I bring baked goods over to share.

I wouldn't call myself a baked goods snob but I do believe that homemade is the best.  If you must buy something a local bakery is the next best option.  Store bought pre-made in a box is not something I recommend.  Too many preserves.  After working in retail I know that you just never know how long something is sitting on the shelf.

Buy local and support your community!

XOXO

Thursday, November 29, 2012

S'mores Bars

Oh my gawd!  These are amazing.  Drool worthy.  I am pretty sure this S'mores Bar is better than smore's itself.

So amazing.  It's very rich so a small piece will be very satisfying.  But I won't stop you from washing 3 pieces down with a huge glass of milk.


S'mores Bar
From Wit & Whistle

Ingredients:
1/2 cup butter, room temperature
1/4 cup brown sugar
1/2 cup sugar
1 large egg
1 teaspoon vanilla extract
1 1/3 cup all purpose flour
3/4 cup graham cracker crumbs
1 teaspoon baking powder
1/4 teaspoon salt
Milk chocolate bars
1 1/2 cup marshmallow creme/fluff (not melted marshmallows)

Instructions:
1.  Preheat oven to 350F.  Grease an 8-inch square baking pan.
2.  In a large bowl, cream together butter and sugar until light.
3.  Beat in egg and vanilla extract.
4.  In a small bowl, whisk together flour, graham cracker crumbs, baking powder and salt.
5.  Add dry mixture to butter mixture and mix at a low speed until combined.
6.  Divide dough in half and press half of dough into an even layer on the bottom of the prepared pan.
7.  Place chocolate bars over dough.  2 king size Hershey's bars should fit perfectly side by side, but break the chocolate if necessary to get it to fit in a single layer no more than 1/4 inch thick.
8.  Spread chocolate with marshmallow creme or fluff.
9.  Place remaining dough in a single layer on top of the fluff.
10.  Bake for 30 to 35 minutes until lightly browned.  Cool completely before cutting bars.

Please try to resist from cutting the bars before it cool.  It is worth the wait. 

Let the baking season begin!

XOXO

Monday, July 9, 2012

Rice Crispy Treats

Tzu Chi has started the summer math tutoring program for July.  This is really a great program for kids.  Every Saturday from 10am to 12pm kids grades K-algebra can come and get math tutoring for free.  I am pretty sure that free is always good. Snacks are also provided.  Since I am no math pro I will be part of the snack making crew.

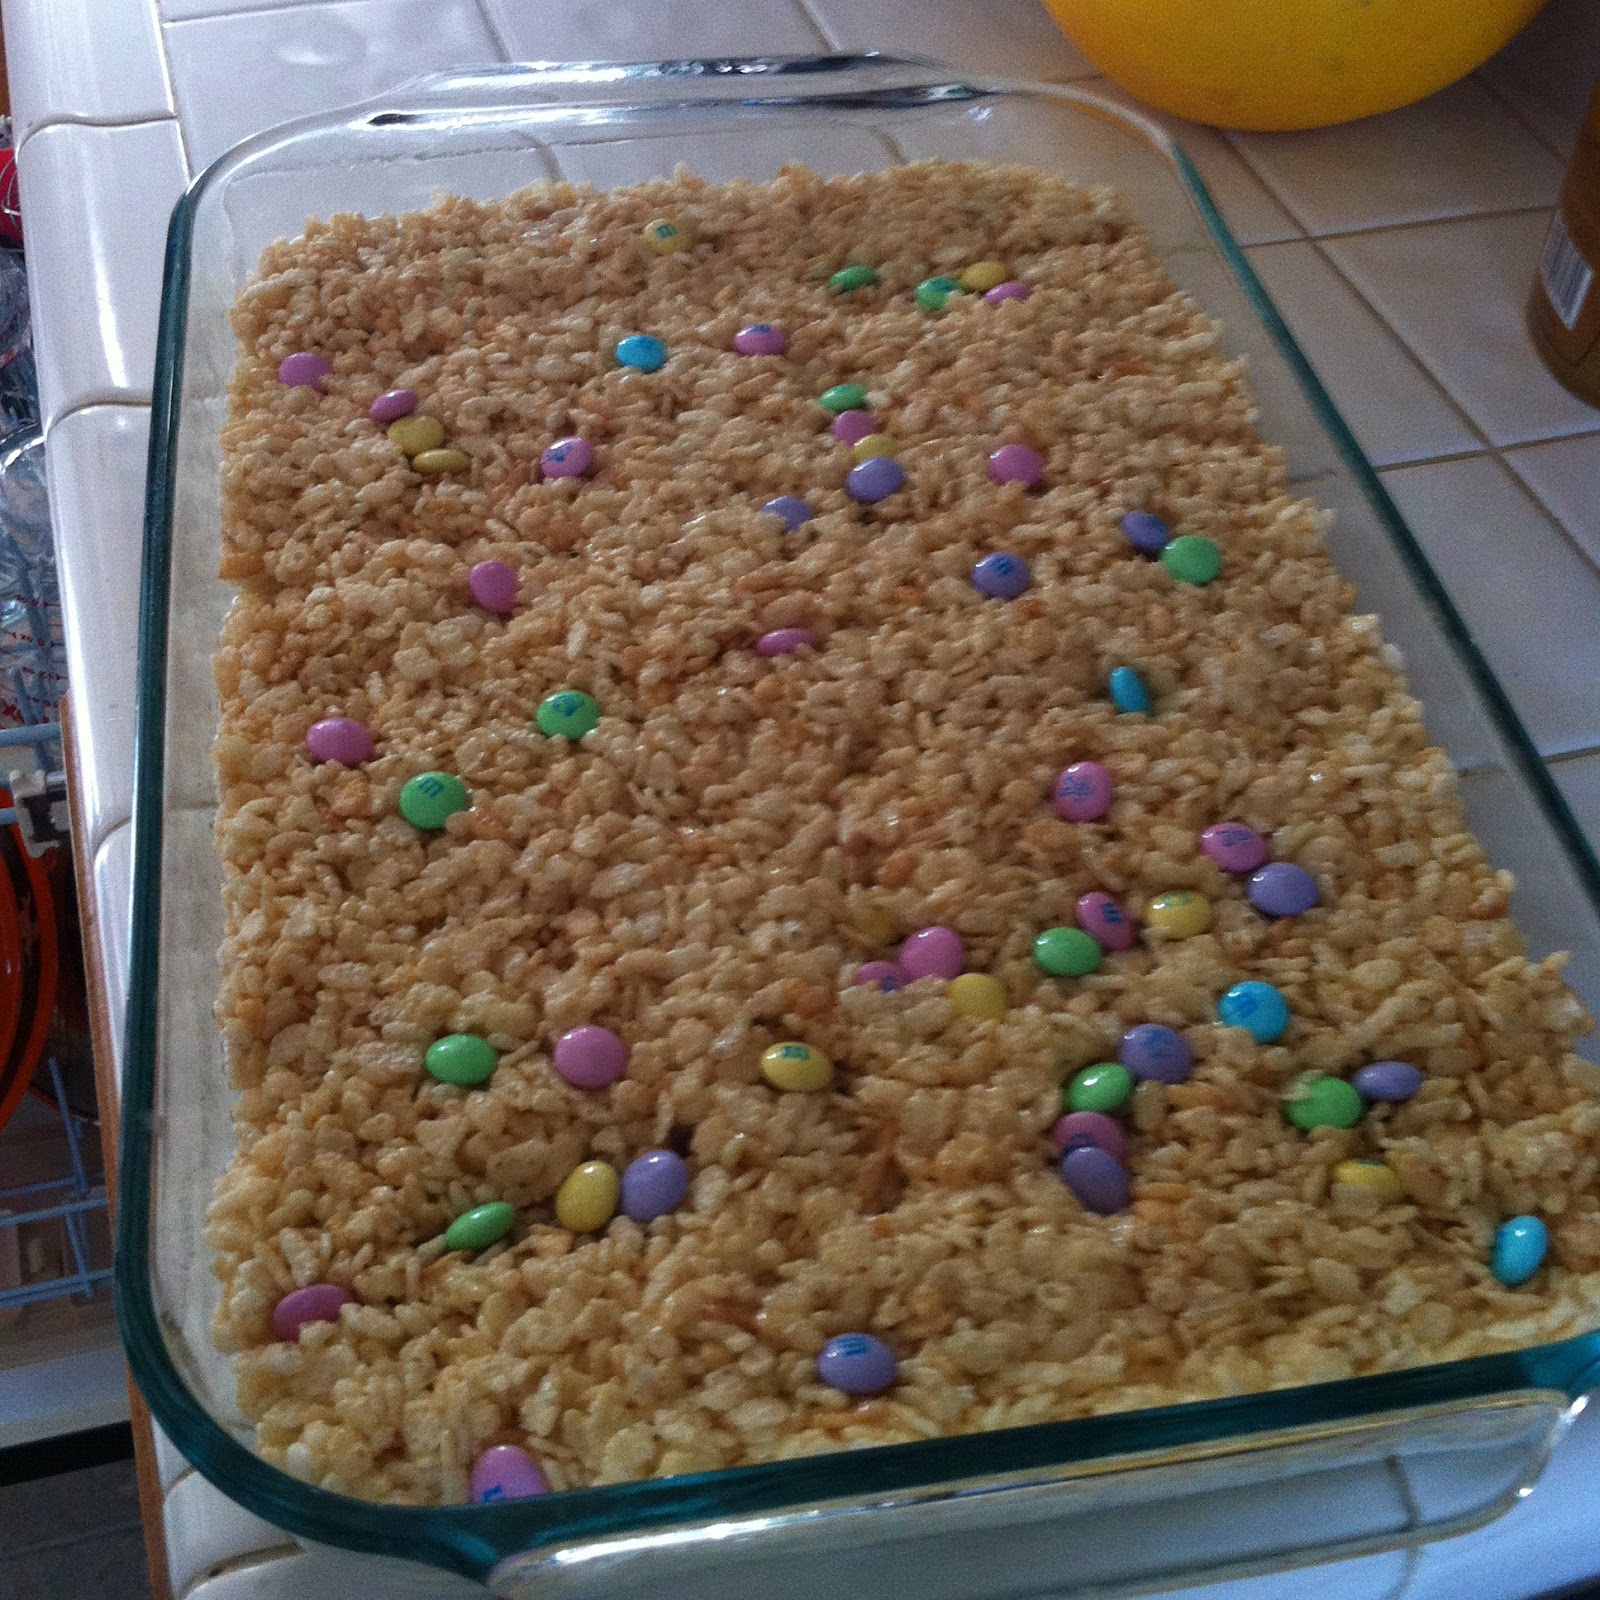
For the first session I wanted to be extra careful since I did not know if any kids had allergies yet.  So what do I make?!?  Rice crispy treats!  Now I didn't know that there were people who didn't know how to make homemade rice crispy treats.  But I got asked for the recipe so I figured I would share on the blog.

Rice crispy treats really are super simple.  Any kinds of sprinkles or candies can be added.  If you want to get adventurous you can use other cereals instead of rice cereal too.


Rice Crispy Treats

Ingredients:
1 box rice crispy cereal (12 oz box)
1 bag mini marshmallow
1/4 cup butter
1 teaspoon vanilla extract
1/4 cup M&Ms

Directions:
  1. Microwave butter in a large bowl.
  2. Add mini marshmallows into bowl with the melted butter.  Microwave in 30 second intervals until melted.  Stir after each interval.
  3. Add vanilla extract to the marshmallow mixture for extra flavor. 
  4. Spray a very large bowl with cooking spray and fill with cereal.  Add the marshmallow mixture to the cereal and mix.  
  5. Add any sprinkles or candy.
  6. Spray a 9 x 13 baking dish with cooking spray.  Press rice crispy cereal mixture into pan.  Let set for about 10 minutes.
  7. Slice and enjoy!
These homemade rice crispy treats were a hit with the kiddies.  But then again who wouldn't love something covered in marshmallow?  El Hubby even considered coming to volunteer to eat some rice crispy treats.  I let him have some for the promise of volunteering next time.  We will see.


Khloe the pup really only has two speeds.  Excited and lazy.  She is very good at both. 

Keep on cooking!

XOXO
Peggy

Monday, February 13, 2012

Peanut Butter Banana Chocolate Chip Bread

There is no better combination than peanut butter and chocolate.  I am pretty sure no one would disagree with me.  If you do ... YOU ARE INSANE!

Of course once again I have ripe bananas in my kitchen so of course I have to make something with bananas.  Of course my pup in laying in the sun in my kitchen waiting to be spoiled so I have to bring out the peanut butter.  So ... what does a girl do?  She makes peanut butter banana chocolate chip bread!


Peanut Butter Banana Chocolate Chip Bread
Adapted from Lauren's Latest

Ingredients:
1/2 cup all purpose flour
1/2 cup wheat flour
1/2 teaspoon baking powder
1/2 teaspoon baking soda
1/2 teaspoon salt
1/2 teaspoon cinnamon
1/4 cup sugar
1/4 cup packed brown sugar
1/4 cup vegetable oil
1/4 cup smooth peanut butter
1 egg
2 very ripe bananas, mashed
1 teaspoon vanilla extract
1/2 cup chocolate chips

Directions:
1.  Preheat oven to 325F.
2.  Whisk flour, baking powder, baking soda, salt, cinnamon, sugar, and brown sugar.
3.  Create a well in the center and pour in vegetable oil, peanut butter, egg, bananas, and vanilla extract.  Mix until just combined.
4.  Stir in chocolate chips.
5.  Grease a mini loaf pan.
6.  Divide evenly between loaf pans and bake for about 20-25 minutes or until a toothpick comes out clean when inserted.
7.  Cool 5 minutes in pan and remove to cooling racks.  Serve warm or at room temperature.

These were delish!   And since I used a ice cream scooper to scoop the batter into the pans my mini loafs were easy to break in half to share or double fist.  I need to make these more often.  Maybe next time I will sprinkle some oats on top to make it look healthier.  Muahahaha!

The pup got her spoon full of peanut butter so she is a happy camper and ready to play.  I swear she should do Kong ball commercials.  I for sure buy enough of those balls to keep the company in business. 

Keep baking and playing with your fur babies!
XOXO

Friday, February 10, 2012

Better-than-sex Cake

Last weekend was a crazy weekend.  There was the Tzu Chi new year blessing event, meeting the brother in law's girlfriend for the first time, and last but not least Super Bowl Sunday.  Like I said, jammed packed!

The new year blessing was a success.  Around 200 people attended the event not including the volunteers that ran the event.  Thankfully I did not forget any of my sign language that I had to perform.  Man did I practice for that thing and am so glad it is over.  I am not artistic at all when it comes to artsy stuff like drawling and sign language.  But I survived!  Survived without embarrassing myself or my loved ones!

My mom was in charge of providing breakfast for the set up crew in the morning.  So what does she do?  She has me bake.  I am such a good daughter!  Actually not so good daughter cause the cake I decided to make was better-than-sex cake.  I found this recipe online and marked it as a must try.  I mean come on.  With a name like better-than-sex cake who wouldn't want to try it.  Of course I had to call it something else at Tzu Chi.  I guess better-than-kissing cake.

I ended up making this cake for Super Bowl Sunday too to bring to my cousin's party.  I think after hearing the name of the cake it makes people want to try it more.

Better-than-sex Cake

Ingredients:
1 box yellow cake mix
1 box instant vanilla pudding (4oz)
4 eggs
1 cup sour cream
1/2 cup vegetable oil
1 cup water
1 cup mini semi sweet chocolate chips

Directions:
1.  Preheat oven to 350F and grease a bundt pan
2.  Mix cake mix, vanilla pudding mix, eggs, sour cream, oil and water.  Mix well.
3.  Stir in chocolate chips.
4.  Pour batter into prepared bundt pan and bake for 1 hour or until a toothpick inserted comes out clean.
5.  Allow to cool in pan for about 15 minutes.  Turn cake out and let cool before eating.

This cake was amazing.  Super moist.  But I guess that is expected from a cake that has pudding mix and sour cream.  Oh and so easy to make!  I love semi-homemade recipes.  They are easy yet still have that homemade touch.

So is this cake better than sex?  Well know one said it wasn't.  Try it for yourself and let me know!

Keep on baking!
XOXO

Tuesday, July 5, 2011

4th of July Flag Cake

So my AC is acting up and we cannot turn it on.  This holiday weekend it was over 104 all 4 days.  Needless to say I did not want to stay in the kitchen too long.  (Oh and I don't even want to get into the story of my AC.  Fingers crossed it will not cost me my first born child to fix.)

Since it was a steamy 90 degrees in my home I tried to make my holiday dessert as simple as possible.  Hopefully all the sweating has cause me to loose some weight so I can eat more of this cake.  The flag cake I made is from a box cake mix with some simply homemade cream cheese frosting topped with fresh strawberries and blueberries.  How much easier can you get? 

Ingredients:
1 box white cake mix
1/3 cup vegetable oil
1 1/4 cup water
3 eggs
8 oz cream cheese
1/4 cup butter (1 stick)
1 teaspoon vanilla extract
2-3 cups of powder sugar
Strawberries, quartered
blueberries

Direction:
1.  Pre heat oven to 350F degrees.  Prepare a 9 x 13 pan with PAM.
2.  Mix white cake mix with vegetable oil, water, and eggs.
3.  Pour batter into pan and back for 26 minutes or until a tooth pick come out clean.
4.  Let cake cool in pan for about 10 minutes and then transfer to cooling rack.
5.  Beat cream cheese and butter.  Once combined add vanilla extract.
6.  Add powder sugar 1/4 cup at a time until you reach a consistency you like.
7.  Frost cake with cream cheese frosting on cooled cake.  Decorate with strawberries and blueberries.

This cake is nice and refreshing on a hot day.  The cake is a yummy dessert and the fruit keep it refreshing.  The red, white, and blue colors keep the cake festive for the holiday.  My family really enjoyed this cake on the 4th of July.  My grandmother even had 2 slices of cake.  So if you don't have much time but still want to have something homemade this is a great recipe for the holidays. 

Enjoy!
XOXO

Sunday, May 8, 2011

Simple Yummy Shortbread Cookies


I have been looking for a easy not too sweet cookie recipe for a long time. Coming from a Chinese background family members are always asking for a cookie that is not too sweet. Well I have finally found something to make the old Asian women happy. These shortbread cookies are not only easy to make but super yummy. Just sweet enough to satisfy the sweet craving.

Ingredients:
1 cup butter
1/2 cup sugar
2 1/2 cups flour

Directions:
1. Preheat oven to 300 degrees

2. Cream together butter and sugar.

3. Stir in the flour. You may have to use hands until it all come together.

4. Use 1 tablespoon scoop to measure out the correct amount and place into mini cupcake pan.

5. Press the shortbread into the pan to create a well for the jam when finished baking.

6. Bake for about 15 minutes.

7. When completely cooled place a teaspoon of your favorite jam in the center of the cookies and dust with powdered sugar.

Even my grandparents who are not a fan of dessert loved these. Ah finally!

XOXO