Wednesday, February 12, 2020

Double Chocolate Chip Cookies

My kid will always eat a chocolate chip cookie with sprinkles. It's her go to. It is also what I make the most in my house. But honestly ... it is the best cookie.


Just simple ingredients.

This recipe is also a great made ahead recipe. Which with two kiddos I for sure have frozen cookies in my freezer.

Please excuse the Christmas theme. You gotta use what you got.

I also love using a cookie scoop. So much easier to portion out cookies.

This batter requires refrigeration. Do not skip this step. This prevents the cookies from spreading.

You can either bake after refrigerating or thrown them in a bag and freeze for later.

For these cookies I rolled them again in red sprinkles for extra color.  Or more like Baby Girl wanted to help make the cookies "prettier".

Double Chocolate Chip Cookies

Ingredients:
  • 2 and 1/4 cup all purpose flour
  • 1 teaspoon baking soda
  • 1 and 1/2 teaspoon cornstarch
  • 1/2 teaspoon salt
  • 3/4 cup butter, unsalted & melted
  • 3/4 cup brown sugar, packed
  • 1/2 cup sugar, granulated
  • 1 large egg + 1 egg yolk, room temperature
  • 2 teaspoons pure vanilla extract
  • 1/2 cup semi sweet chocolate chips
  • 1/2 cup white chocolate chips
  • 1/4 cup sprinkles
Directions:
  1. In a large bowl, whisk flour, baking soda, cornstarch, and salt together. Set aside.
  2. In a medium bowl, whisk the melted butter, brown sugar, and granulated sugar together until no lumps remain. Wisk in the egg, and then the egg yolk until mixed. Wisk in the vanilla extract.
  3. Pour the wet ingredients into the dry ingredients and mix together with a rubber spatula. the dough will be very soft and thick. Fold in the chocolate chips and sprinkles. Scoop the dough out with a cookie scooper. Cover the dough and chill in the refrigerator for 1 or two hours. Then take out the dough and roll them into balls. Put them back into the refrigerator for about another 1-2 hours. Chilling is mandatory. This give the cookie dough it's flavor and prevents them from spreading. Now they are ready for the freezer. Put the cookie dough balls in a ziplock bag, label them with the date, bake time and oven time.
  4. Take cookie dough out and put them in a Ziploc bag. Unbaked cookie dough balls freeze well for up to 3 months. Bake frozen cookie dough balls for 14 minutes at 325F, no need to thaw cookie dough balls.
Keep cookies my friends!
XOXO

Tuesday, February 11, 2020

Mama's Pork Chop Marinade

My mom makes the best fried pork chop hands down.  She went through this phase where she was a vegetarian for like 5 years or so.  Thank goodness she still made her friend pork chop. 


I was able to get her pork chop marinade recipe.  It's super easy and makes the yummiest pork chops.  I have El Husbee grill pork chops ... cause ... you know ... I am lazy. 


Ingredients:

  • 1/4 cup soy sauce
  • 2 tablespoons sesame oil
  • 2 tablespoons brown sugar
  • 5 cloves minced garlic
  • 1/4 teaspoon black pepper
  • 1/8 teaspoon white pepper
Directions:
  1. Marinade for 4 to 24 hours.  
  2. Fry pork chops or grill.  
  3. Serve with rice. Enjoy!
Make this recipe friends.  It is yummy.  Your whole house will smell yummy when you make it too.  

XOXO

Wednesday, January 22, 2020

Cornbread

I love cornbread.  It is so good.  It is also something that I can my with Baby Girl.  She loves to stir and this is something she can handle.  


This recipe is super easy to make.  The only ingredient that you might not have on hand at home is buttermilk. 


Cornbread

Ingredients:

  • 1 cup cornmeal
  • 1 cup all purpose flour
  • 1 teaspoon baking powder
  • 1/2 teaspoon baking soda
  • 1/8 teaspoon salt
  • 1/2 cup melted butter cooled
  • 1/3 cup brown sugar packed
  • 2 tablespoon honey
  • 1 large egg, room temperature
  • 1 cup buttermilk at room temperature

Directions:

  1. Preheat oven to 400F.  Grease a 8 or 9 inch square baking pan.  Set aside.  
  2. Whisk the cornmeal, flour, baking powder, baking soda, and salt together in a large bowl.  
  3. Whisk melted butter, brown sugar, and honey together.  Then whisk in the egg until combined.  Finally whisk in the buttermilk.  
  4. Pour the wet ingredients into the dry ingredients and mix with a spatula until combined.  Try to not over mix.  Make sure to scrape the bottom of the bowl not to miss anything.  
  5. Pour batter into prepared baking pan.  Bake for 20 minutes or until golden brown on top and the center is cooked through.  Use a toothpick to test.  
  6. Allow to cool before slicing and serving.  
Your house will smell so good when you make this.  Try your best to wait for the cornbread to cool to slice.  This is really hard.  But if you slice when it is warm the cornbread will crumble a lot.  This cornbread is great with chili, soup or in my house it can replace any carbohydrate.  

Enjoy!  

Monday, January 6, 2020

Cilantro Lime Chicken Marinade

Trying to survive and eat healthy with two kids.  El Husbee and I are trying to eat healthy and teach out kids to eat healthy.  For the most part the kids love food prep.  Which is good for us as long as we keep up with it.  I got this marinade recipe from a friend and have slightly changed it to adapt my family needs.  My family seems to love it. 


I have been using this marinade on chicken thigh.  So far so good. 


I do however leave the grilling to El Husbee. 


Cilantro Lime Chicken
Marinade:
  • 1/4 cup fresh lime juice
  • 1/4 cup chopped cilantro
  • 1 teaspoon salt
  • 5 cloves garlic minced
  • 1 teaspoon oregano
  • 1teaspoon garlic powder
  • 1/2 teaspoon cumin
  • 1 tablespoon chili powder
  • 1 teaspoon lemon pepper
  • 1/2 teaspoon black pepper
  • 1/2 cup olive oil
Hope you enjoy the recipe as much as my family!


Keep on cooking!

Monday, October 29, 2018

Double Chocolate Chip Sprinkle Cookies

So some people have asked to see what the frozen cookie dough balls look like after they are baked.  Apparently there are some doubts about frozen cookies dough. Well here you go!  Here is a plate of the frozen cookie dough baked.  Delicious cookies in a snap! 


Double Chocolate Chip Sprinkle Cookies

Ingredients:
  • 2 and 1/4 cup all purpose flour
  • 1 teaspoon baking soda
  • 1 and 1/2 teaspoon cornstarch
  • 1/2 teaspoon salt
  • 3/4 cup butter, unsalted & melted
  • 3/4 cup brown sugar, packed
  • 1/2 cup sugar, granulated
  • 1 large egg + 1 egg yolk, room temperature
  • 2 teaspoons pure vanilla extract
  • 1/2 cup semi sweet chocolate chips
  • 1/2 cup white chocolate chips
  • 1/4 cup rainbow sprinkles 
Directions:
  1. In a large bowl, whisk flour, baking soda, cornstarch, and salt together.  Set aside.
  2. In a medium bowl, whisk the melted butter, brown sugar, and granulated sugar together until no lumps remain.  Wisk in the egg, and then the egg yolk until mixed.  Wisk in the vanilla extract. 
  3. Pour the wet ingredients into the dry ingredients and mix together with a rubber spatula.  the dough will be very soft and thick.  Fold in the chocolate chips and sprinkles.  Scoop the dough out with a cookie scooper.  Cover the dough and chill in the refrigerator for 1 or two hours.  Then take out the dough and roll them into balls.  Put them back into the refrigerator for about another 1-2 hours.  Chilling is mandatory.  This give the cookie dough it's flavor and prevents them from spreading. Now they are ready for the freezer.  Put the cookie dough balls in a ziplock bag, label them with the date, bake time and oven time. 
  4. Take cookie dough out and put them in a Ziploc bag.  Unbaked cookie dough balls freeze well for up to 3 months.  Bake frozen cookie dough balls for 14 minutes at 325F, no need to thaw cookie dough balls. 
If you have kids or even if you just love fresh baked cookies, then you must make these for your freezer.  I love being about to have fresh baked cookies anytime I want.  I also love knowing the ingredients in my food. 

Keep baking friends!
XOXO

Friday, October 26, 2018

Snickerdoodle Blondies


Sometimes it's nice to bring back old recipes.  I haven't made this recipe in years.  El Husbee had a potluck and he signed up for dessert.  I decided to make this recipe as I had all the ingredients in my pantry. 


These snicker doodle blondies smell so good when baking.  This recipe is super easy.  The hardest party is spreading the batter because the batter is so thick.  Once you get the batter spread it's super easy. 


This recipe calls for a lot of cinnamon sugar.  But it is yummy AND make the whole house smell yummy. 


I haven't mastered how to spread the batter evenly and pretty.  But honestly if you just cut the edges I am sure it is the same. 


Snickerdoodle Blondies


Ingredients:
  • 2 2/3 cups all purposes flour
  • 2 teaspoon baking powder
  • 1 teaspoon salt
  • 2 cups brown sugar, packed
  • 1 cup butter, unsalted room temperature
  • 2 eggs, room temperature
  • 1 tablespoon vanilla extract
  • 2 tablespoon sugar, granulated
  • 2 teaspoon cinnamon

Directions:
1.  Preheat oven to 350 degrees.  Line a 9/13 baking pan with parchment and spray with oil.
2.  Whisk together flour, baking powder and salt.  Set aside.
3.  Cream butter, brown sugar until creamy (about 3 minutes).  Add eggs and vanilla extract until fully incorporated.
4.  Add the flour mixture 1/4 cup at a time until fully incorporated.  Do not over mix!
5.  Spread the batter evenly in the prepared pan.  Batter will be thick.
6.  Combine sugar and cinnamon.  Sprinkle the sugar mixture evenly over the batter.
7.  Bake for 25-30 minutes or until a toothpick inserted comes out clean.  Remove from oven and let cool on a wire rack.
8.  Cut and enjoy!


These blondies are perfect with coffee.  I love this recipe because it's something different than the traditional brownie recipe. 


Keep baking friends!
XOXO

Thursday, October 25, 2018

Teriyaki Chicken

Lately the struggle has been real trying to decide what to make for dinner.  Thank goodness for easy recipes like this that my family enjoys. 


 This is my go to teriyaki sauce recipe that I use.  It is super easy to make and my family seems to like it.  You can use it for teriyaki chicken or shrimp. 


I am thankful for easy recipes like these on a weekday. 

Teriyaki Sauce

Ingredients:
  • 1 Tablespoon cornstarch
  • 1 Tablespoon water
  • 1/4 cup brown sugar
  • 2 Tablespoons honey
  • 1/2 cup soy sauce
  • 1/4 cup rice wine vinegar
  • 1 teaspoon minced garlic
Directions: 
  1. Wisk cornstarch and water together in a small bowl.  This is for thickening the sauce. 
  2. Combine the cornstarch mixture with brown sugar, honey, soy sauce, rice wine vinegar, and garlic. 
  3. Pour sauce into a small saucepan over low heat.  Allow to simmer while whisking.  Bring to a boil then remove from heat. 
  4. Cook with your choice of protein. 
I like to sprinkle sesame seeds for garnish.  Service with rice and a vegetable and dinner is ready!

Keep cooking friends!
XOXO


Wednesday, October 24, 2018

Cranberry Orange Muffins

Fall is here.  Well it's October.  Here in California depending on where you live it's still hot.  But whatever.  It's October and therefore Fall is here.  Baking in the Fall/Winter is the best.  Baking warms your house and makes it smell amazing. 


 I decided to celebrate the cooler weather with some cranberry orange muffins.  This recipe is super easy to make.  The batch is pretty small so you don't have to worry about tons of leftovers.  Or you can double the recipe and share with friends. 


The tart cranberries make the muffins perfect for drenching orange icing over the top.  The orange is stubble but yummy.


Cranberry Orange Muffins


Ingredients:
1 and 3/4 cups all purpose flour
1 teaspoon baking soda
1 teaspoon baking powder
1/2 teaspoon ground cinnamon
1/2 teaspoon salt
1/2 cup butter, soften and unsalted
3/4 cup granulated sugar
2 large eggs
1/2 cup Greek yogurt
1 teaspoon vanilla extract
1/3 cup milk
zest of 1 orange
1/2 cup chopped walnuts
1 and 1/2 cup fresh cranberries

Orange Icing
1 cup confectioners sugar
juice of 1 orange (about 3 Tablespoons)


Directions:
  1. Preheat oven to 425F.  Spray a muffin pan with non stick spray or line with cupcake liner.  Set aside. 
  2. In a large bowl, toss the flour, baking soda, baking powder, cinnamon, and salt together.  Set aside.
  3. In a stand mixer fitted with a paddle attachment, beat the butter on high speed until smooth, about 1 minute.  Add the granulated sugar and beat until creamed, about 2 minutes.  Scrape down the sides as needed.  Add the eggs, Greek yogurt, and vanilla extract.  Beat on medium speed for 1 minute.  Scrape down the sides and bottom of the bowl as needed. 
  4. Pour the dry ingredients into the wet ingredients and beat on low speed until just combined.  Do not over mix.  Add the milk and orange zest and beat until just combined.  Fold in the walnuts and cranberries. 
  5. Use a ice scoop to fill each cup or liner.  Fill all the way to the top,  Bake the muffins for 5 minutes at 425F, then keeping the muffins in the oven, reduce the oven temperature to 350F.  Bake for an additional 15-18 minutes or until a toothpick inserted in the center comes out clean.  The total time these muffins take in the oven is about 22-23 minutes.  Allow the muffins to cool in the pan for about 5 minutes then transfer to a wire rack.
  6. Whisk the confectioners sugar and orange juice together.  Drizzle over muffins. 


The muffins are perfect for the fall weather!  The muffins stay fresh stored in the refrigerator for about 1 week. 


Keep baking friends!
XOXO

Tuesday, October 23, 2018

Double Chocolate Chip Sprinkle Cookies

What's better than chocolate chip cookies?  Nothing!  Well maybe except sprinkles. 


I used my go to chocolate chip recipe and just changed the mix in a little. 


Sprinkles really make Baby Girl happy.  So I decide to throw some in to the cookie dough batter. 


This recipe is super easy and makes the softest cookies. 


These little guys are all ready for the freezer!


Double Chocolate Chip Sprinkle Cookies

Ingredients:
  • 2 and 1/4 cup all purpose flour
  • 1 teaspoon baking soda
  • 1 and 1/2 teaspoon cornstarch
  • 1/2 teaspoon salt
  • 3/4 cup butter, unsalted & melted
  • 3/4 cup brown sugar, packed
  • 1/2 cup sugar, granulated
  • 1 large egg + 1 egg yolk, room temperature
  • 2 teaspoons pure vanilla extract
  • 1/2 cup semi sweet chocolate chips
  • 1/2 cup white chocolate chips
  • 1/4 cup rainbow sprinkles 
Directions:
  1. In a large bowl, whisk flour, baking soda, cornstarch, and salt together.  Set aside.
  2. In a medium bowl, whisk the melted butter, brown sugar, and granulated sugar together until no lumps remain.  Wisk in the egg, and then the egg yolk until mixed.  Wisk in the vanilla extract. 
  3. Pour the wet ingredients into the dry ingredients and mix together with a rubber spatula.  the dough will be very soft and thick.  Fold in the chocolate chips and sprinkles.  Scoop the dough out with a cookie scooper.  Cover the dough and chill in the refrigerator for 1 or two hours.  Then take out the dough and roll them into balls.  Put them back into the refrigerator for about another 1-2 hours.  Chilling is mandatory.  This give the cookie dough it's flavor and prevents them from spreading. Now they are ready for the freezer.  Put the cookie dough balls in a ziplock bag, label them with the date, bake time and oven time. 
  4. Take cookie dough out and put them in a Ziploc bag.  Unbaked cookie dough balls freeze well for up to 3 months.  Bake frozen cookie dough balls for 14 minutes at 325F, no need to thaw cookie dough balls. 


All this cookie dough making is suppose to be food prep for when Baby Boy arrives.  However, I don't know if these cookies will last until then. 


Keep baking friends!
XOXO
Monday, September 24, 2018

13 Prime Steak

Belated anniversary wishes to El Husbee!  Time flies when you are having fun and making memories.  This year we celebrated our 10 year wedding anniversary.  With a house, a fur child, a kid and a baby on the way we have been very blessed these past 10 years. 

El Husbee surprised me with dinner at a fancy new steakhouse that just opened up.  We had a really good time and the food was super yummy.


We got their fried calamari for a appetizer.  It was so good!  The pepper relish is a nice touch.  We got a salad but pregnant me was so hungry I did not get a picture.  We got the 13 Prime House Salad and it came with a fried egg on top.  So good and creamy.  Are pregnant women suppose to eat eggs that are not cooked all the way?  Oh well! But totally get the salad.  It's good. 


I got the pan roasted chicken.  I know.  You are suppose to get steak at a steakhouse.  But pregnant me just didn't feel like a steak.  The chick was really good and I really liked the lemon chimichurri. 


El Hsubee got the Black Coffee Rubbed Ribeye.  It was delicious.  The steak was cooked perfectly and the mashed potatoes was garlicy and melt in  your mouth.  However, it was sweet.  El Husbee had a hard time finishing it because of how sweet it was.  The steak also comes with a BBQ sauce.  I totally recommend getting the steak but I would do it as a shared item.  The restaurant also lets you get additional sides. 


I have been waiting to talk about this dessert.  I got the banana foster's French toast.  It's French toast with a side of coffee ice cream.  The coffee ice cream was perfect for cutting the sweetness of the bananas foster French toast.  The French toast was a perfect crunch.  It was soooooo good!  I ate the whole thing.  Like hands down the best part of the dinner for me. 


El Husbee got the bread pudding.  It was good it and he really enjoyed it. 

We really liked 13 Prime Steak and totally recommend it for date night or a special occasion.  The service was really good.  We had a reservation but the people behind us just walked in and it didn't see like they had to wait for very long.  There is a bar and it did look like people were eating at the bar.  We really want to go back and try the burger. 

13 Prime Steak
1345 N. Willow Avenue, #190
Clovis, CA 93619
559-216-1313

Keep eating friends!
XOXO

Friday, September 21, 2018

Chocolate Chip Cookie

The way to Baby Girl's heart is cookies.  She has loved cookies ever since she could eat them.  However, Baby Girl also has developed a palate for cookies.  No Nabisco for this girl.  I have been using a super simple chocolate chip cookies recipe that my family loves. 


This is the cookie dough right before I wrapped them in saran wrap and chilled them in the refrigerator.  Once they have chilled for about 1-2 hours I will take them out again and roll them into balls.  Then stick them back into the refrigerator for about another 1 or 2.  Then I will put them in a Ziploc bag label with the date, bake temperature, and bake time.  Now the cookie dough balls are ready for the freezer.  Frozen cookie dough is good for about 3 months.  You just pop however many cookies you want straight out of the freezer and into the oven for super yummy cookies!


Chocolate Chip Cookies

Ingredients:
  • 2 and 1/4 cup all purpose flour
  • 1 teaspoon baking soda
  • 1 and 1/2 teaspoon cornstarch
  • 1/2 teaspoon salt
  • 3/4 cup butter, unsalted & melted
  • 3/4 cup brown sugar, packed
  • 1/2 cup sugar, granulated
  • 1 large egg + 1 egg yolk, room temperature
  • 2 teaspoons pure vanilla extract
  • 1 cup semi sweet chocolate chips 
Directions:
  1. In a large bowl, whisk flour, baking soda, cornstarch, and salt together.  Set aside.
  2. In a medium bowl, whisk the melted butter, brown sugar, and granulated sugar together until no lumps remain.  Wisk in the egg, and then the egg yolk until mixed.  Wisk in the vanilla extract. 
  3. Pour the wet ingredients into the dry ingredients and mix together with a rubber spatula.  the dough will be very soft and thick.  Fold in the chocolate chips.  Scoop the dough out with a cookie scooper.  Cover the dough and chill in the refrigerator for 1 or two hours.  Then take out the dough and roll them into balls.  Put them back into the refrigerator for about another 1-2 hours.  Chilling is mandatory.  This give the cookie dough it's flavor and prevents them from spreading. Now they are ready for the freezer.  Put the cookie dough balls in a ziplock bag, label them with the date, bake time and oven time. 
  4. Take cookie dough out and put them in a Ziploc bag.  Unbaked cookie dough balls freeze well for up to 3 months.  Bake frozen cookie dough balls for 14 minutes at 325F, no need to thaw cookie dough balls. 
These cookies are a staple in my family.  It's so nice to just be able to pop some cookie dough balls in the oven after dinner and have fresh cookies ready in minutes.  Once you make these you will never use store bought cookie dough even again.

Freezing cookie dough balls is also perfect for the holidays.  This makes having fresh baked cookies super easy AND it makes Christmas cookie platters super easy to make. 

Keep baking friends!
XOXO

Thursday, September 20, 2018

Bluebuerry Streusel Muffins

It's so hard to get breakfast ready in the morning on the weekdays.  Between getting ready, feeding the dog, packing lunches, and getting the kid up and ready.  Who has time for breakfast?  But since we are trying to lead by example for Hargow I wanted to make something semi healthy. You know.  Besides throwing a toasted waffle in a bag for her to eat in the car.  


There are all kinds of streusels.  This one is super easy to make.  You can add it to the muffins in layers or just put on top.  I am too lazy for layers so I just sprinkle mine on top. 


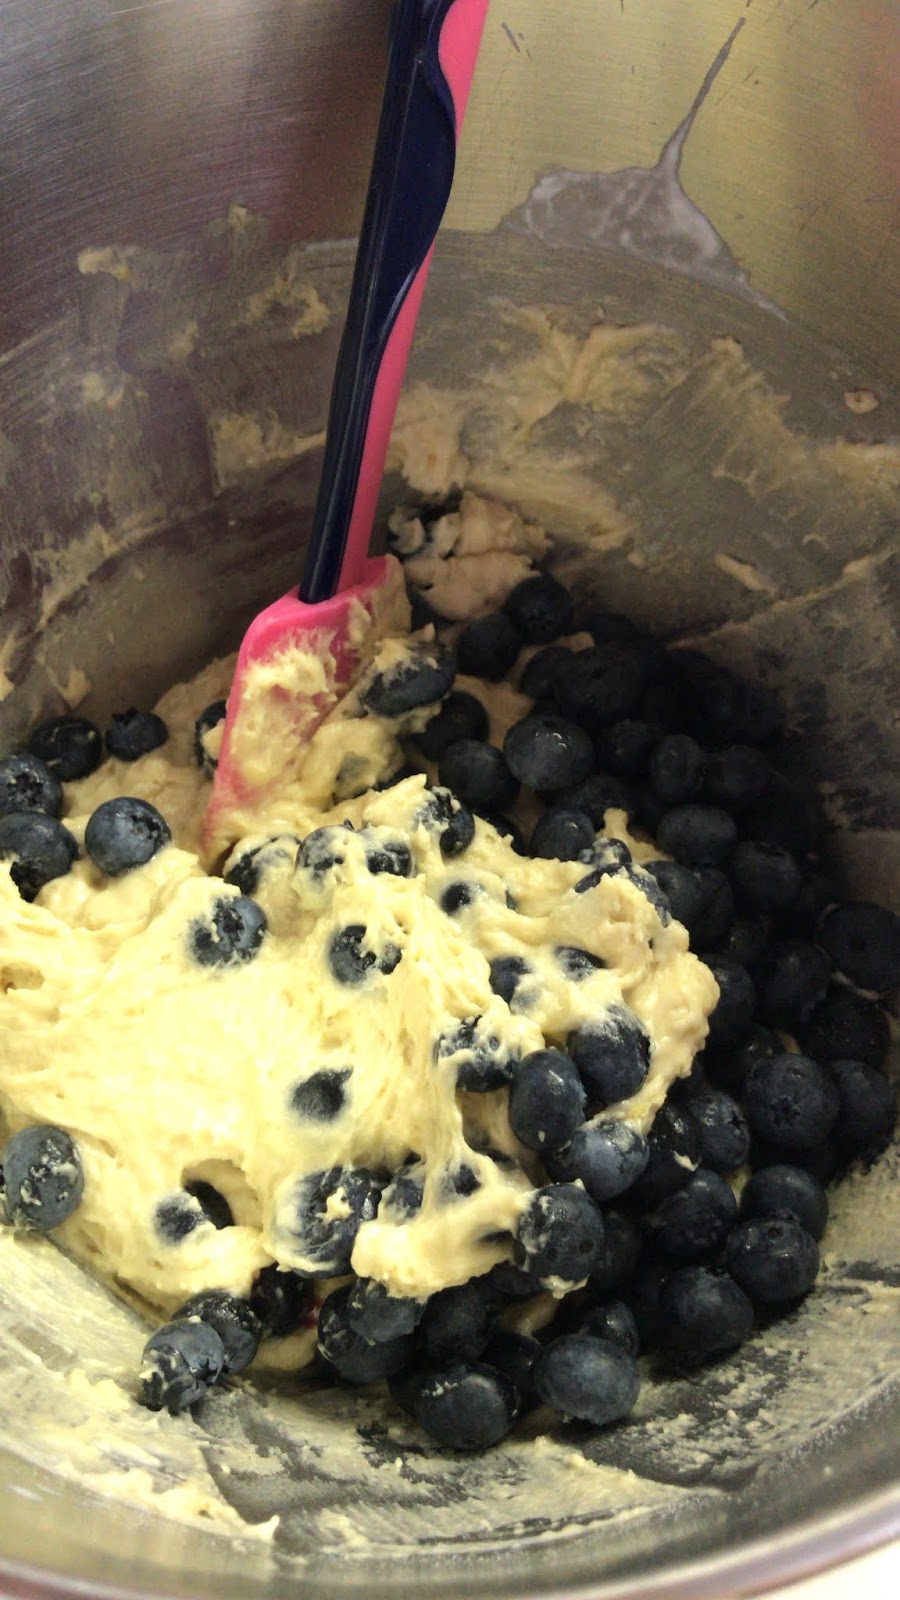
Fresh blueberries are the best.  However, you can totally substitute with frozen.  Just make sure when you use frozen to NOT defrost. 


This batter will be little thick.  Which for me is perfect for using a ice cream scoop to scoop out. 


The blueberries might burst but don't worry about it.  It just means there will be pretty blue/purples swirls.  If using frozen blueberries make sure you mix them into the batter while they are frozen. 


I use a ice cream scoop to scoop out my muffins BECAUSE I am lazy and BECAUSE it is super easy. 


I am too lazy to layer the streusel so I just pack all the streusel on top.  The more the merrier!


These muffins smell so good when they are cooling on the rack.  You can eat them warm or wait for them to cool.  You can slather butter on them or eat them plain. 


Blueberry Streusel Muffins

Ingredients:
     Streusel
  • 1/2 cup brown sugar
  • 1/2 cup pecans, chopped
  • 1 teaspoon ground cinnamon
     Muffins
  • 1/2 cup butter, unsalted softened to room temperature
  • 1/2 cup granulated sugar
  • 1/4 cup packed brown sugar
  • 2 eggs, large room temperature
  • 1/2 cup Greek yogurt
  • 2 teaspoons vanilla extract
  • 1 and 3/4 cup all purpose flour
  • 1 teaspoon baking soda
  • 1 teaspoon baking powder
  • 1/2 teaspoon salt
  • 1/4 cup milk
  • 1 and 1/2 cup fresh blueberries
Directions:
  1. Preheat oven to 425F.  Spray 12 count muffin pan with nonstick spray or line with cupcake liners.  Set aside.
  2. Make the streusel:  In a small bowl, toss together the brown sugar, nuts, and cinnamon.  Set aside.
  3. Make the muffins:  In a stand mixer fitted with a paddle attachment, beat the butter on high speed until smooth and creamy.  Add the granulated sugar and brown sugar and beat on high until creamed.  Scrape down the sides and bottom of the bowl to make sure fully incorporated.  Add the eggs, Greek yogurt, and vanilla extract.  Beat on medium speed until the mixture is fully combined.  Scrape down the sides and bottom of the bowl. 
  4. In a separate bowl, whisk the flour, baking soda, baking powder, and salt together.  Pour the dry ingredients into the wet ingredients and beat on low speed until just about combined.  Add the milk and beat until combined.  Fold in the blueberries with a rubber spatula. 
  5. Use a ice cream scoop to scoop out the batter info the prepared muffin tin.  Top with the streusel.  Bake the batch for 5 minutes  at 425F then keeping the muffins in the oven, lower the oven temperature to 350F and bake for 18-21 more minutes or until a toothpick inserted comes out clean.  The total time these muffins take in the oven is about 23-26 minutes. 
My family loved these muffins.  They were perfect for a quick breakfast.  I actually feel like they are better the next day because all the flavors really stick. 

Keep cooking friends!
XOXO


Wednesday, September 19, 2018

Strawberry Pretzel Dessert

So I am that person who always brings dessert for potlucks.  I am always to scared to bring anything else.  I totally need to build up my confidence on other food. 

A popular dessert I have started making is strawberry pretzel dessert.  If you have never had it you are for sure missing out.  It's a cold dessert that is a layer of strawberry jell-o, cream cheese filling, and pretzel crust.  


I like to use butter pretzels.  There is something about the buttery salty taste that makes the crust so yummy. 


Lots of pretzels because crust is always delicious. 


This is a super easy crust. 


The best part is that baking the crust makes your whole house smell delicious. 


This dessert contains such simple ingredients. 


The cream cheese filling is so yummy.  This can totally be used as a dip for fruit too.  BUT try not to sample too much of it because you want all the cream cheese filling to make sure that the layers keep separated. 


Why is strawberry Jell-O so good?


Jell-O always smells so good!


Make sure you spread the cream cheese layer all the way to the side of the dish.  This is VERY important as it keeps the Jell-O layer from seeping through to the other layers. 


Adding strawberries isn't a must but it sure makes this dish taste good.  However, I have totally added strawberries AND blueberries to make this dish festive. 


This dessert is super easy to make.  It takes a little time but skill level is for sure easy. 


Strawberry Pretzel Dessert
Ingredients:
  • 6oz package strawberry Jell-O
  • 2 cups boiling water
  • 2 1/2 cups salted pretzels
  • 1/4 cup granulated sugar
  • 8 tablespoons unsalted butter
  • 8oz package cream cheese, soften
  • 1/2 cup granulated sugar
  • 8oz tub cool whip, thawed
  • 1lb fresh strawberries, hulled and sliced
Instructions:
  1. Preheat oven to 350F. 
  2. Combine strawberry Jell-O with 2 cups boiling water and stir until completely dissolved.  Set aside to cool to room temperature. 
  3. Crush 2 1/2 cups pretzels in a sturdy Ziploc bag using a rolling pin.  Melt butter and add 1/4 cup sugar and mix.  Mix in crushed pretzels.  Press into a 9x13 glass casserole dish.  Bake for 10 minutes.  Cool to room temperature. 
  4. Beat 8oz cream cheese and 1/2 cup sugar until fluffy.  Fold in 8oz Cool Whip until no streaks of cream cheese remain.  Spread mixture over cooled pretzels.  Make sure to go all the way to the edge of the dish to create a seal.  Refrigerate for 30 minutes to set. 
  5. Stir in strawberries into Jell-O.  Pour and spread strawberry Jell-O mixture evenly over cooled cream cheese layer.  Refrigerate to set (2-4 hours). 


This is totally a favorite in my family and friends.  If you have the time make this dessert.  You will not regret it!


Keep cooking friends!
XOXO