Wednesday, April 25, 2012

Banana Bread

Okay, I am really trying to leave my banana phase.  Especially because we are in spring and there are so many fruits and berries to choose from. So many fruit stands ... strawberries, oranges, blueberries, raspberries, etc.


So of course my mother would drop off brown bananas to me.  Of course I cannot waste food.  Of course I made a banana bread.  Blame my mother. 


Banana Bread

Ingredients:
1 stick butter, soften
1 1/4 cup granulated sugar
2 overripe bananas
2 eggs
4 tablespoons sour cream
3/4 cups all purpose flour
3/4 cups whole wheat flour
1 teaspoon baking soda
1 teaspoon vanilla extract
1/2 cup toffee pieces

Directions:
1.  Preheat oven to 350 degrees.  Spray a mini loaf pan (4 mini loaves)
2.  Beat butter and sugar until creamy
3.  Beat in eggs one at a time.
4.  Add the rest of the ingredients until just combined.
5.  Mix in toffee pieces
6.  Pour mixture into prepared mini loaf pan.  Bake for about 30 minutes or until a toothpick inserted comes out clean.

This bread came out nice and tender.  I personally feel like it was full of banana flavor.  However, it was sweet.  Definitely could pass as dessert.

Hopefully the Tzu Chi math tutoring students and volunteers enjoyed the bread.


Sometimes laziness just takes over and there is nothing we can do.    Of course when you are a pup it seems to happen quite often.  The pup must be tired from guarding the house all day.  Well done!

Keep baking friends!

XOXO

Thursday, April 12, 2012

Penne with Chicken, Broccoli, and Sundried Tomatoes

Most of the time when I don't know what to make for dinner I resort to making pasta.

El Hubby:  What's for dinner?
Me:  I don't know.  Pasta?
El Hubby:  I don't really feel like pasta
Me:  Well I don't feel like making dinner.
El Hubby:  Pasta sounds good.

Okay okay this exact conversation did not happen but some sort of it has happened.  I would say "poor husband" but the likelihood of me not feeding his is usually quite small.

Pasta has been on my brain ever since I say my cousin in Taiwan post her Facebook about eating pasta.  Ever since then I have had pasta on the brain.  I wanted something simple to make.  Of course I had not gone to the grocery store in days.  So I went through my stack of "recipes to try" and luckily found this.  And luckily I had all the ingredients.  Oh at least I made it work.
  

Penne with Chicken, Broccoli, and Sundried Tomatoes
Adapted from Smells Like Home

Ingredients:
1 tablespoon olive oil
1 lb chicken, boneless, skinless, trimmed, sliced thin
1 onion, small
1/2 cup sun dried tomatoes
8 garlic cloves, minced
1/8 teaspoon red pepper flakes
1 bottle Alfredo sauce
salt and pepper
1 lb broccoli, florets only
12 oz penne pasta

Directions:
1.  Heat 1 1/2 teaspoons of olive oil in a large skillet over high heat until just smoking.  Salt and pepper chicken.  Add the chicken and cook until lightly browned but not fully cooked, about 2-3 minutes.  Transfer to a bowl.
2.  Lower the heat to medium and add 1 1/2 teaspoon olive oil to the skillet.  When the olive oil is shimmering add the onion and cook until softened, about 5 minutes.  Stir in the sun dried tomatoes, garlic, and red pepper flakes.  Cook until fragrant, about 30 seconds.
3.  Stir in a bottle of Alfredo sauce.  
4.  Cook the pasta according to the package directions.  Add broccoli in 3 minutes before pasta is done.  Drain pasta and broccoli.  Reserve 1/2 cup of pasta water before draining. 
5.  Add the chicken to the sauce.  Cook chicken until done, about 2 minutes. 
6.  Add pasta and broccoli to sauce.  Toss to combine.  Stir in pasta water until you get desired consistency in sauce. 
7.  Serve hot!

This pasta came out amazing.  It is for sure going into the recipe binder.  Oh and let me tell you, the leftovers were even better.


I don't know about other pet owners but I talk to my pup.  This is her face when I talk to her.  Most of the time I think she thinks I am crazy.  Which I am.  Crazy in love with my fur baby.

Get ready for spring and fruits and baking with those fruits!

XOXO

Monday, April 9, 2012

Chewy Coconut Cookies

Sometimes you feel like a nut.  Sometimes you don't.  Okay I never feel like coconut.  But El Hubby loves coconut so the good wifey that I am I make it for him.  It's crazy how much coconut goes through my pantry when I not only don't like coconut but have self proclaimed to hate coconut.  Sorry coconut lovers.  It's true.  I hate coconut.  Except ... when it is covered with caramel and  chocolate and on top of a cookie.  Dang those Girl Scouts and their cookies!


These cookies do not disappoint in the chewy department.  They are moist and CHEWY!  For real!


Chewy Coconut Cookies
Adapted from Anecdotes and Apple Cores

Ingredients:
1 cup all purpose flour
1/4 cup whole wheat flour
1/2 teaspoon baking soda
1/4 teaspoon salt
1/2 cup butter, softened
1/2 cup brown sugar, packed
1/3 cup granulated sugar
1 egg
1/2 teaspoon vanilla extract
1 1/3 cup coconut

Directions:
1.  Preheat oven to 350 degrees.  Line 2 cookie sheets with parchment paper.
2.  Combine flours, baking soda, and salt in a medium bowl, set aside
3.  Cream together butter, brown sugar, and white sugar until smooth and creamy (about 3-4 minutes)
4.  Beat in egg and vanilla until light and fluffy
5.  Gradually stir in the flour mixture
6.  Mix in the flaked coconut
7.  Refrigerate for about 1 hour
8.  Scoop cookie dough onto prepared cookie sheet.
9.  Bake for about 9 minutes or until just golden brown.  Cool on wire racks and then enjoy

With some experiment I have found that cookies are tastier when you refrigerate the dough.  I am no science major but I think it has something to do with science.  Whatever the reason refrigerate your dough.  Your cookies will come out more flavorful.  Maybe that's why store bought cookie dough is good.  Hmmmmm!


Sometimes no one can be trusted.  Especially when it is a prize possession you are keeping safe.  Sometimes the only thing a pup can do is sleep next to her biscuit so she can keep an eye on it. 

Time to put those running shoes on.  Spring is here and summer is right around the corner. 

XOXO

Thursday, April 5, 2012

Garlic Shrimp Pasta

Most nights it's a real struggle for me to come up with what to make for dinner.  I start dreading about dinner as soon as I come back to the office from lunch.  I go as far as asking my co workers what they plan on making for dinner.   Then there is always the dreaded text from El Hubby "what's for dinner".  Some times I just want to text back "poo".  Actually sometimes I do.

I literally threw this together and it was a pretty big hit in my house.  You can probably substitute chicken instead of shrimp or hey go all out and just add some chicken to the shrimp.  You can also probably pretty much use any kind of pasta.  Of course this absent minded wife only hand bow tie pasta so that's what I used.  I am sure you could substitute asparagus for broccoli.  You get the idea. 


Garlic Shrimp Pasta

Ingredients:
1 lb shrimp, peeled, deveined, with tails removed
1 lb bow tie pasta
broccoli
8 garlic cloves, minced
1/4 cup butter
2 teaspoons olive oil
Italian seasoning
black pepper
red pepper flakes
salt

Directions:
1.  Boil pasta in water according to package directions.  Add broccoli at last 2 minutes of cook time.  Reserve 1 cup of the pasta water for use at a later time.  Drain pasta.
2.  In a large skillet over medium heat, melt the butter.  Add shrimp and cook until they are a little pink.  Add garlic and cook 5-7 minutes.  Add olive oil and continue to cook shrimp until they are pink.
3.  Add pasta and broccoli to the skillet, season with Italian seasoning, red pepper flakes, black pepper and salt.  Add enough of the saved pasta water until the mixture is not dry but not simmering in liquid (start by adding 1/4 of a cup and work your way up from there).
4.  Keep tossing all the ingredients around in the skillet until it is well combined and hot.

This will definitely be filed under "make when you have no idea what to make" recipes.

This face brings a smile to my face.  How do you stay mad at a face like that?  

Get those allergy pills read, spring is coming!

XOXO 

Tuesday, April 3, 2012

Banana, Raisin and Apple Bread

I am always trying to find recipes that my Asian family and friends will like.  Not that I don't care about my other friends but lets be honest the Asians are more critical.  Especially when it comes to dessert or anything sweet.  The Asians like to complain a lot about if something is "too sweet".  So finding something sweet to satisfy these people can be really hard.


The banana, raisin and apple bread was pretty easy to make.  I will be honest.  The recipe originally called for dried cranberries but I was out (El Hubby has been eating oatmeal in the morning and apparently used up all the dried cranberries) so I substituted with raisins. 


This bread turned out amazing.  Seriously.  I brought it to Tzu Chi on Sunday and I came home with a empty container.  The Asian people all seemed very happy.  I think the only thing I would have to comment on is that the raisin kinda sunk to the bottom.  So I guess I need to save some flour to sprinkle on them next time to prevent all the raisin form sinking to the bottom.

Banana, raisin and apple bread
Adapted from Anncoo Journal

Ingredients:
1 cup all purpose flour
1/2 cup whole wheat flour
1/2 teaspoon baking soda
1 teaspoon baking powder
1/4 teaspoon salt
3/4 cup sugar
2 eggs
1/2 + 2 tablespoon vegetable oil
4 tablespoons milk
1 teaspoon vanilla extract
1 cup raisins
1 apple, grated
3 large bananas, mashed

Directions:
1.  Preheat oven to 360 degrees and grease a mini loaf pan
2.  Combine flour, baking powder, baking soda, salt and sugar.  Mix well and set aside.
3.  Combine eggs, milk, oil, vanilla extract, grated apple, and mashed bananas.  Mix well.
4.  Add in the dry ingredients into the wet mixture.  Mix until combined.
5.  Add in raisins.
6.  Pour into prepared baking pan.  Bake for about 45 minutes.

Bake this bread friends.  I promise it is worth it.  I would not classify this as a dessert.  But it passes with flying colors for breakfast, brunch, or snack.


The pup loves her biscuits.  It's one of the few words she knows and knows well.

Keep baking friends!

XOXO

Monday, April 2, 2012

Chocolate Chip Toffee Cookies

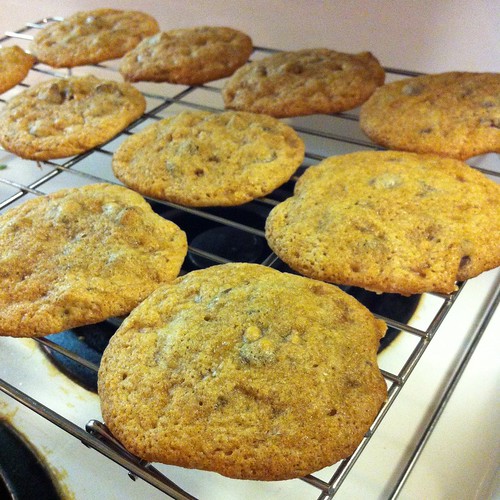
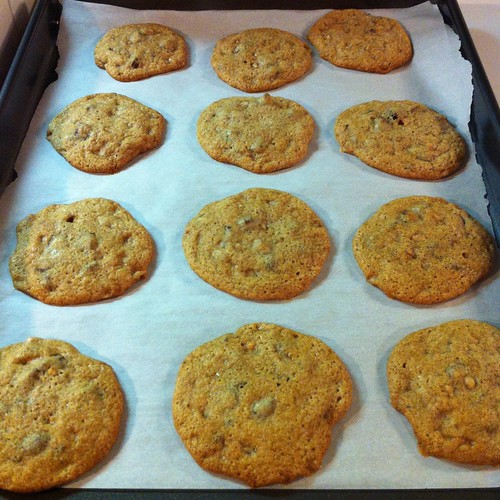
What is better than a chocolate chip cookie?  NOTHING!  Okay wait ... how about a chocolate chip cookie with toffee in it?  Oh yeah!

Chocolate chip toffee cookies

These cookies are amazing.  Just amazing.  They are chewy and light.  Yet packed with flavor.  My picky Asian mother ate 2 in one setting.  That says a lot. 

Chocolate chip toffee cookies

Any dough that calls for melted butter instead of soft butter is my friend.  Come on!  Who has the patience to wait for butter to soften.  Melt that sucker and lets make some cookies!

Chocolate chip toffee cookies

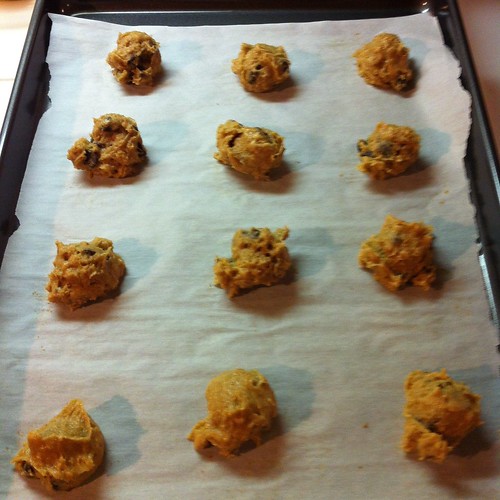
I have come to the conclusion that cookie batter that is made with melted butter instead of soften butter really should be refrigerated before baking.  It just gives it more umph.  You know what I mean?  Of course you now what I mean.  

Chocolate Chip Toffee Cookies
Adapted from The Baker Chick

Ingredients:
1 cup whole wheat flour
1 cup + 2 tablespoon all purpose flour
1/2 teaspoon baking soda
1/2 teaspoon salt
12 tablespoon unsalted butter, melted, cooled
1 cup brown sugar
1/2 cup granulated sugar
1 large egg + 1 egg yolk
2 teaspoon vanilla extract
1 1/4 cup semi sweet chocolate chips
3/4 cup chopped toffee

Directions:
1.  Preheat oven to 325 degrees.  Line two cookie sheets with parchment paper.
2.  Whisk dry ingredients together in a medium bowl; set aside.
3.  Mix butter and sugars until thoroughly combined.
4.  Beat in egg, yolk and vanilla until combined
5.  Add dry mixture and beat until just combined
6.  Stir in chocolate chips and toffee
7.  Refrigerate cookie dough for about 1 hr (more is even better)
8.  Use a cookie scooper to scoop cookies.  Bake for about 11 minutes.
9.  Cool on cookies sheet until able to lift without breaking.  Cool on wire rack.

These cookies have been moved to the top of my cookie list.   I will be making these again for sure.


Khloe the pup is always up for a adventure.   She always has her eye out for when she gets to go somewhere.  And oh man she is always excited.

Keep feeding your friends and family good food. 

XOXO